

Export from
 Notion
Step 1. Navigate to the Page
Open the specific Notion page or database you want to export, and confirm it's the exact content you intend to download.
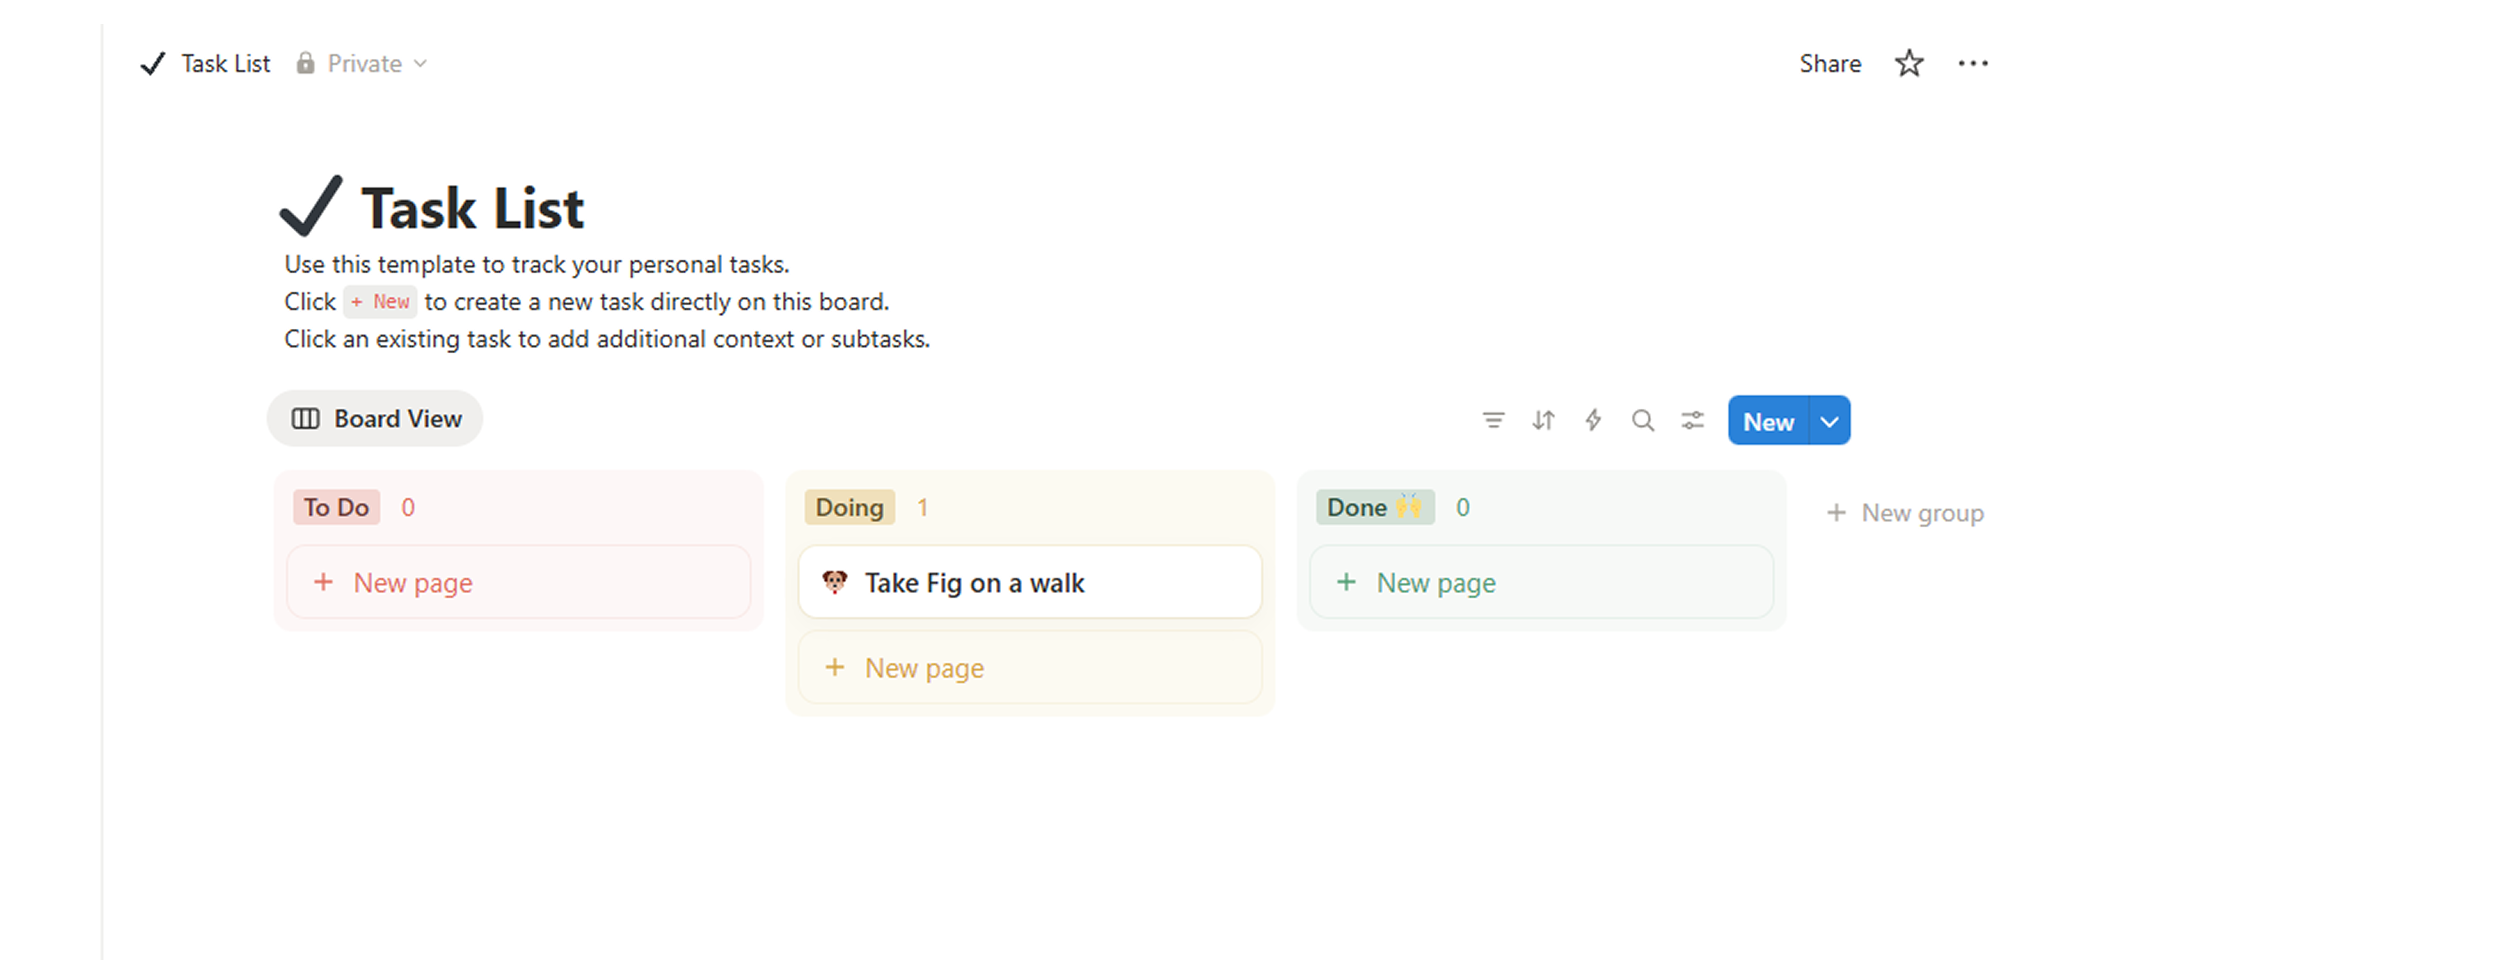
Step 2. Open Page Menu
Click the three-dot icon in the top-right corner of the Notion page to open page-level actions and settings.
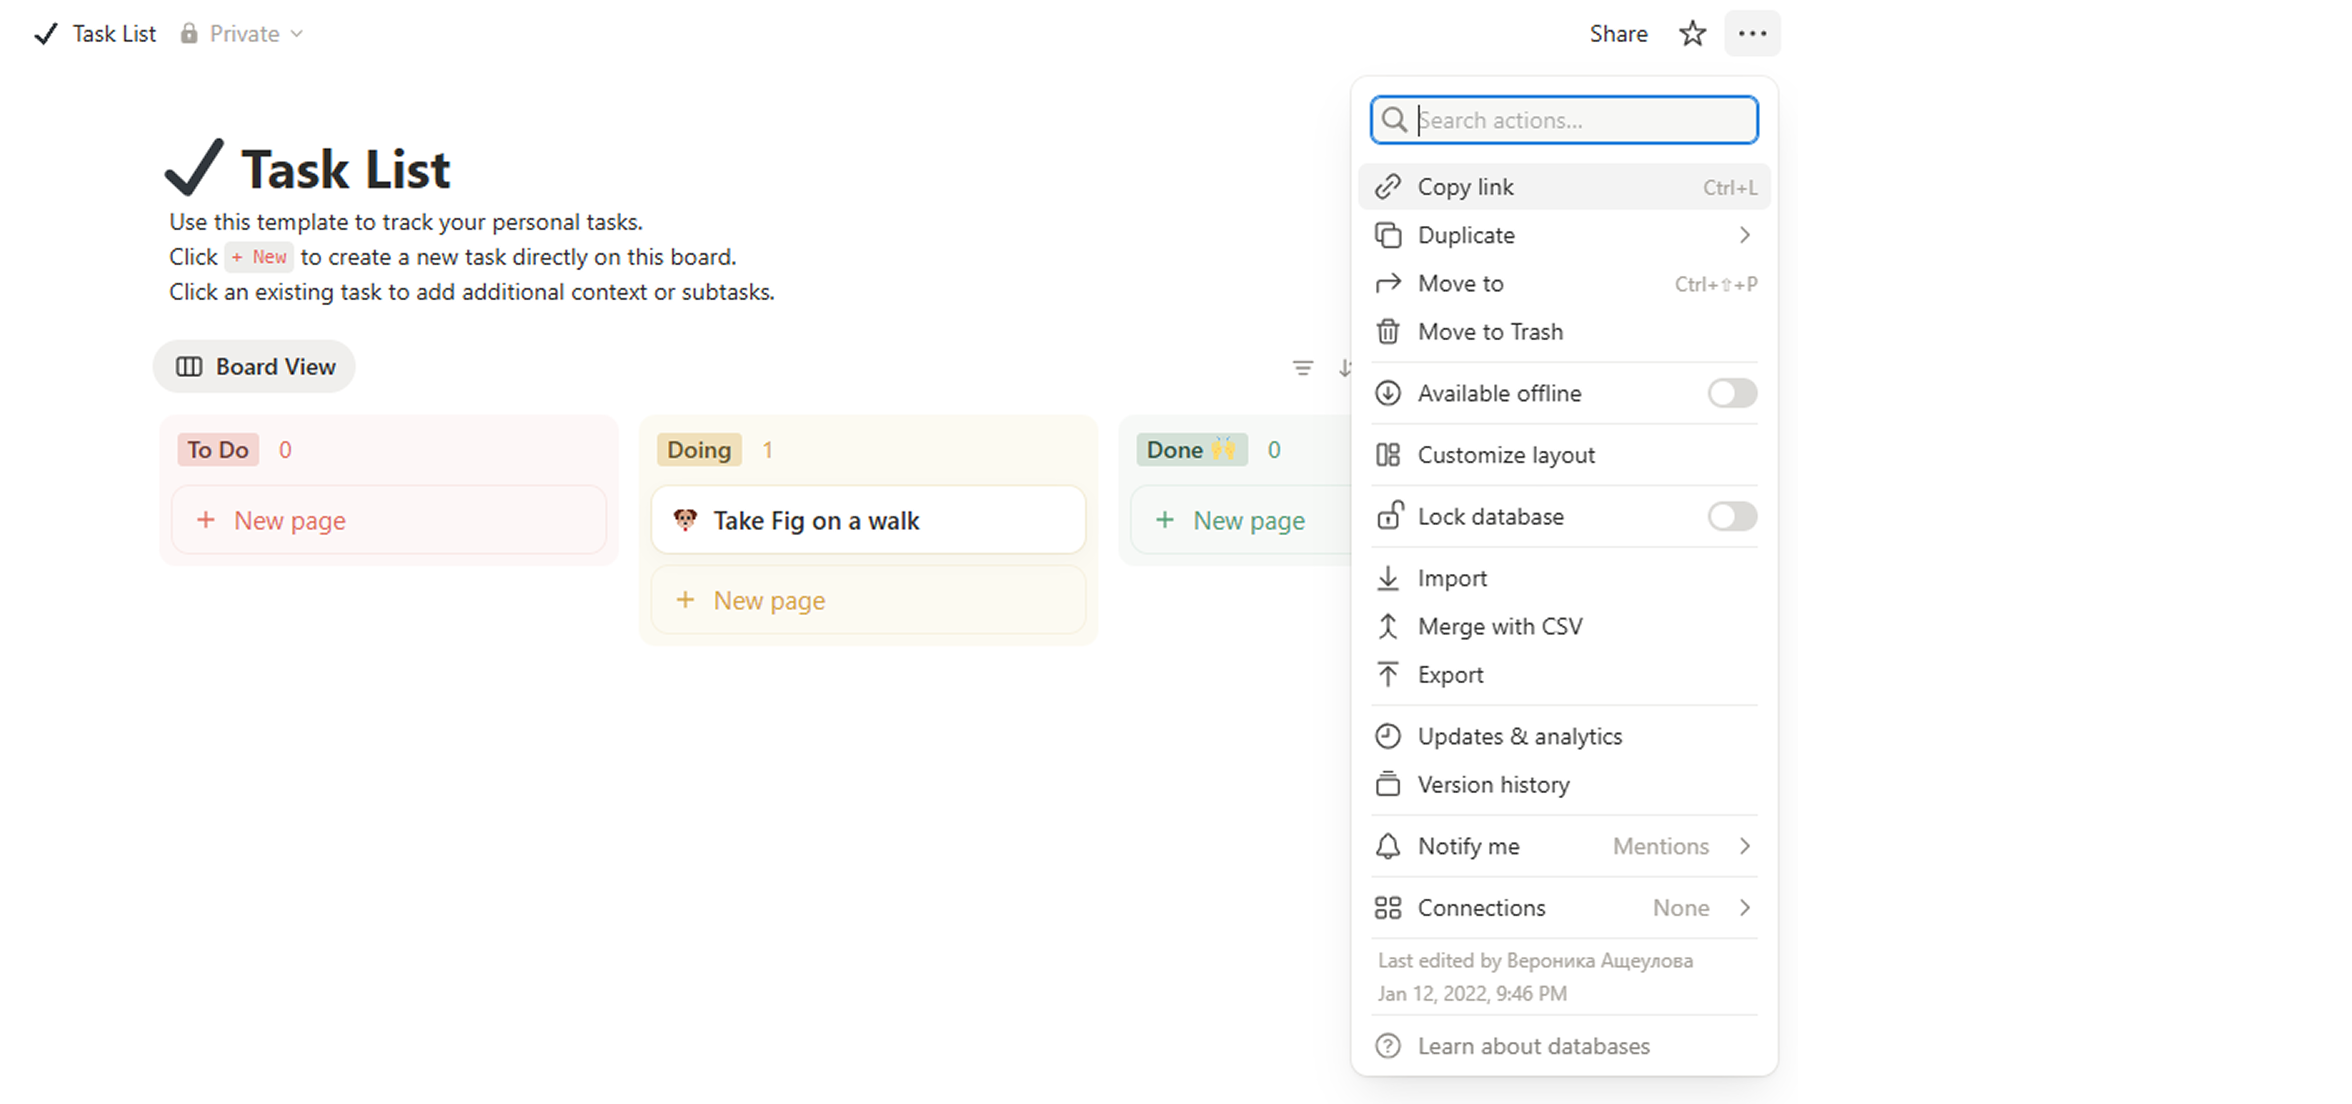
Step 3. Select Export
In the dropdown menu, click Export to open the export configuration modal.
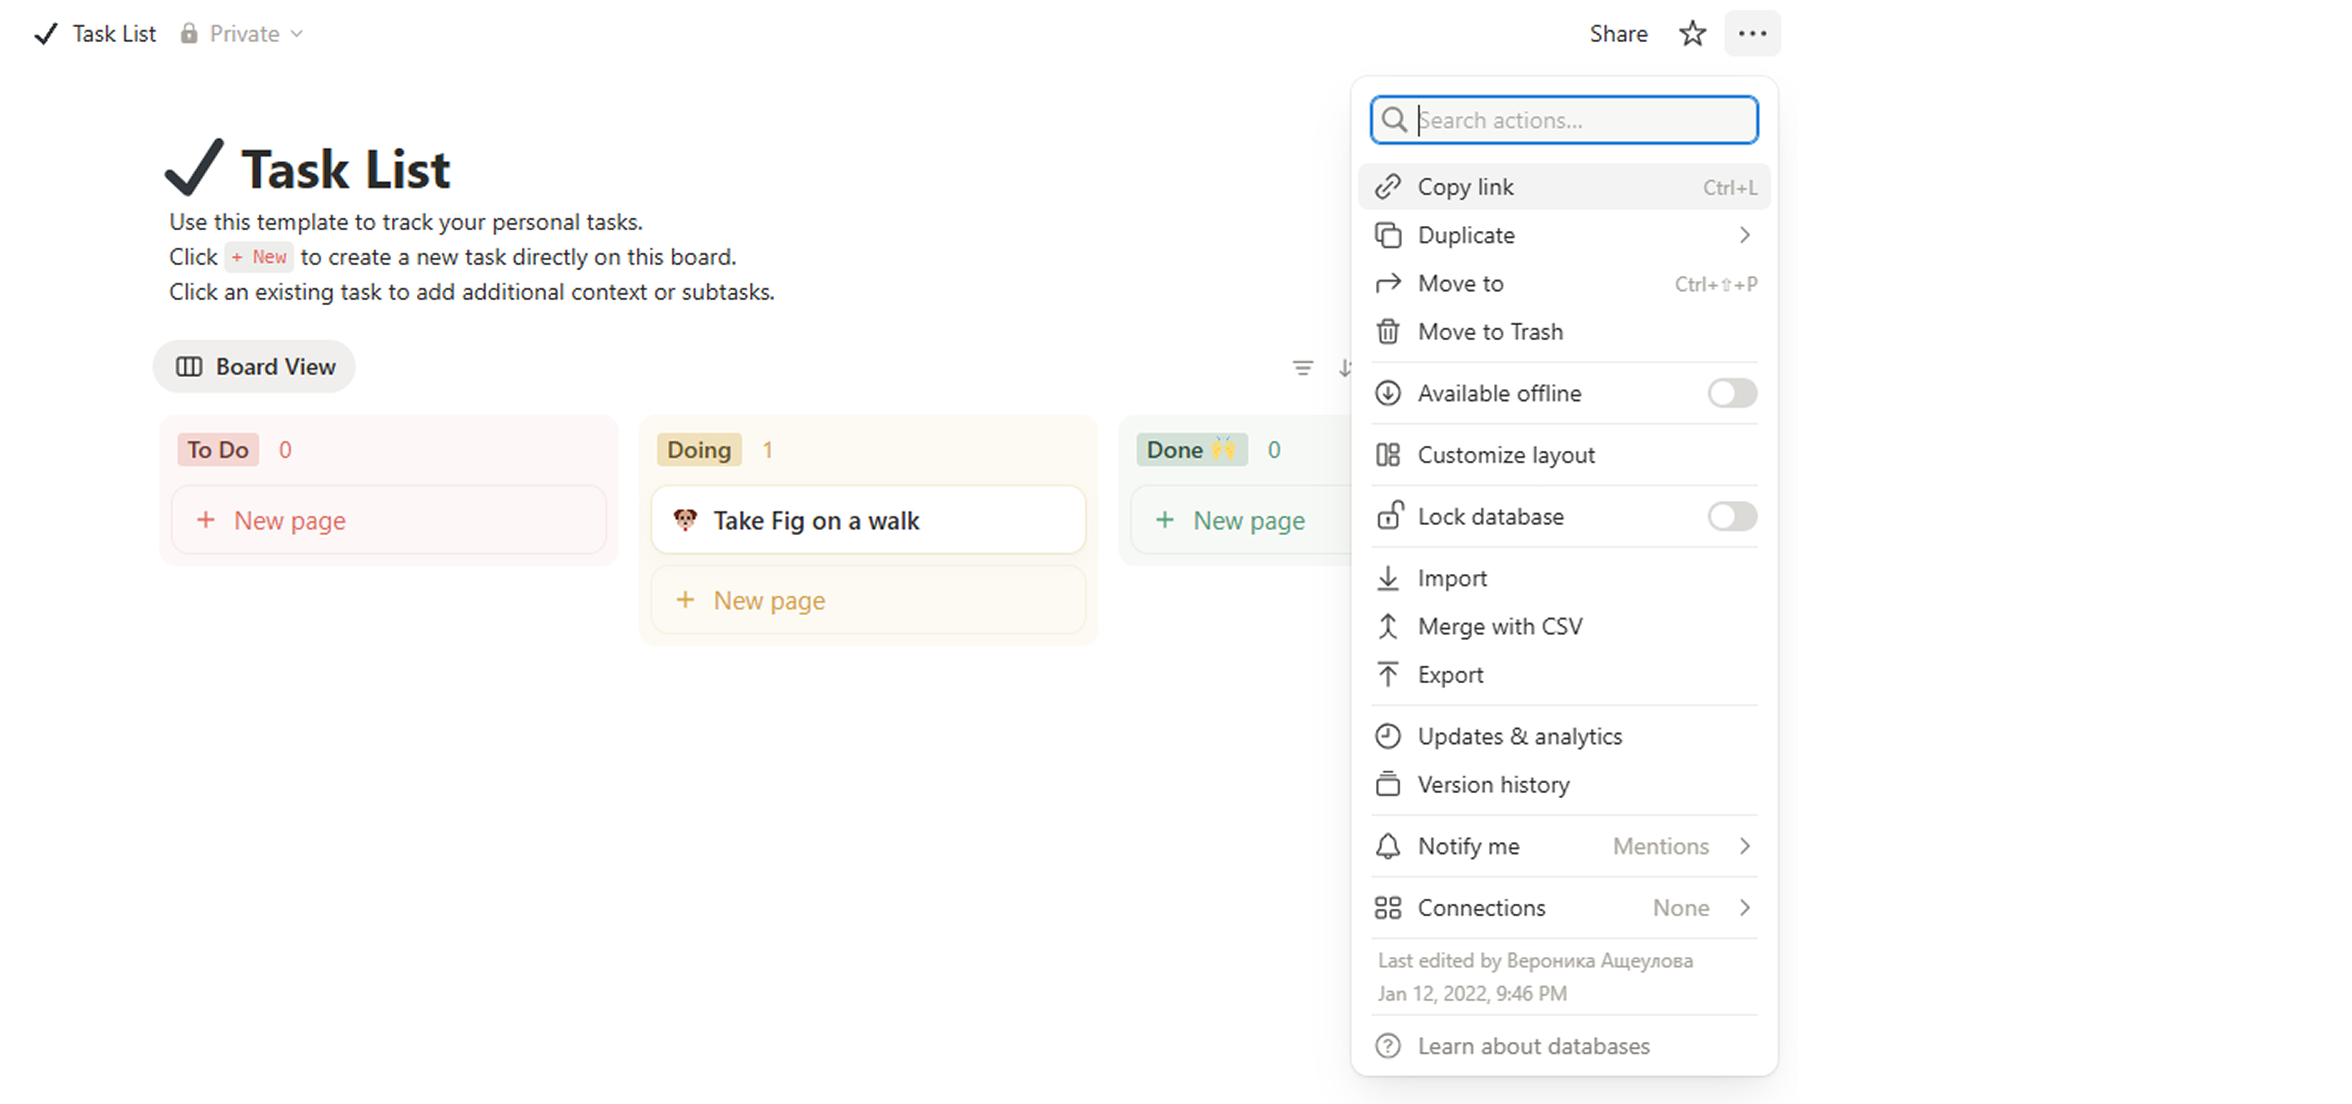
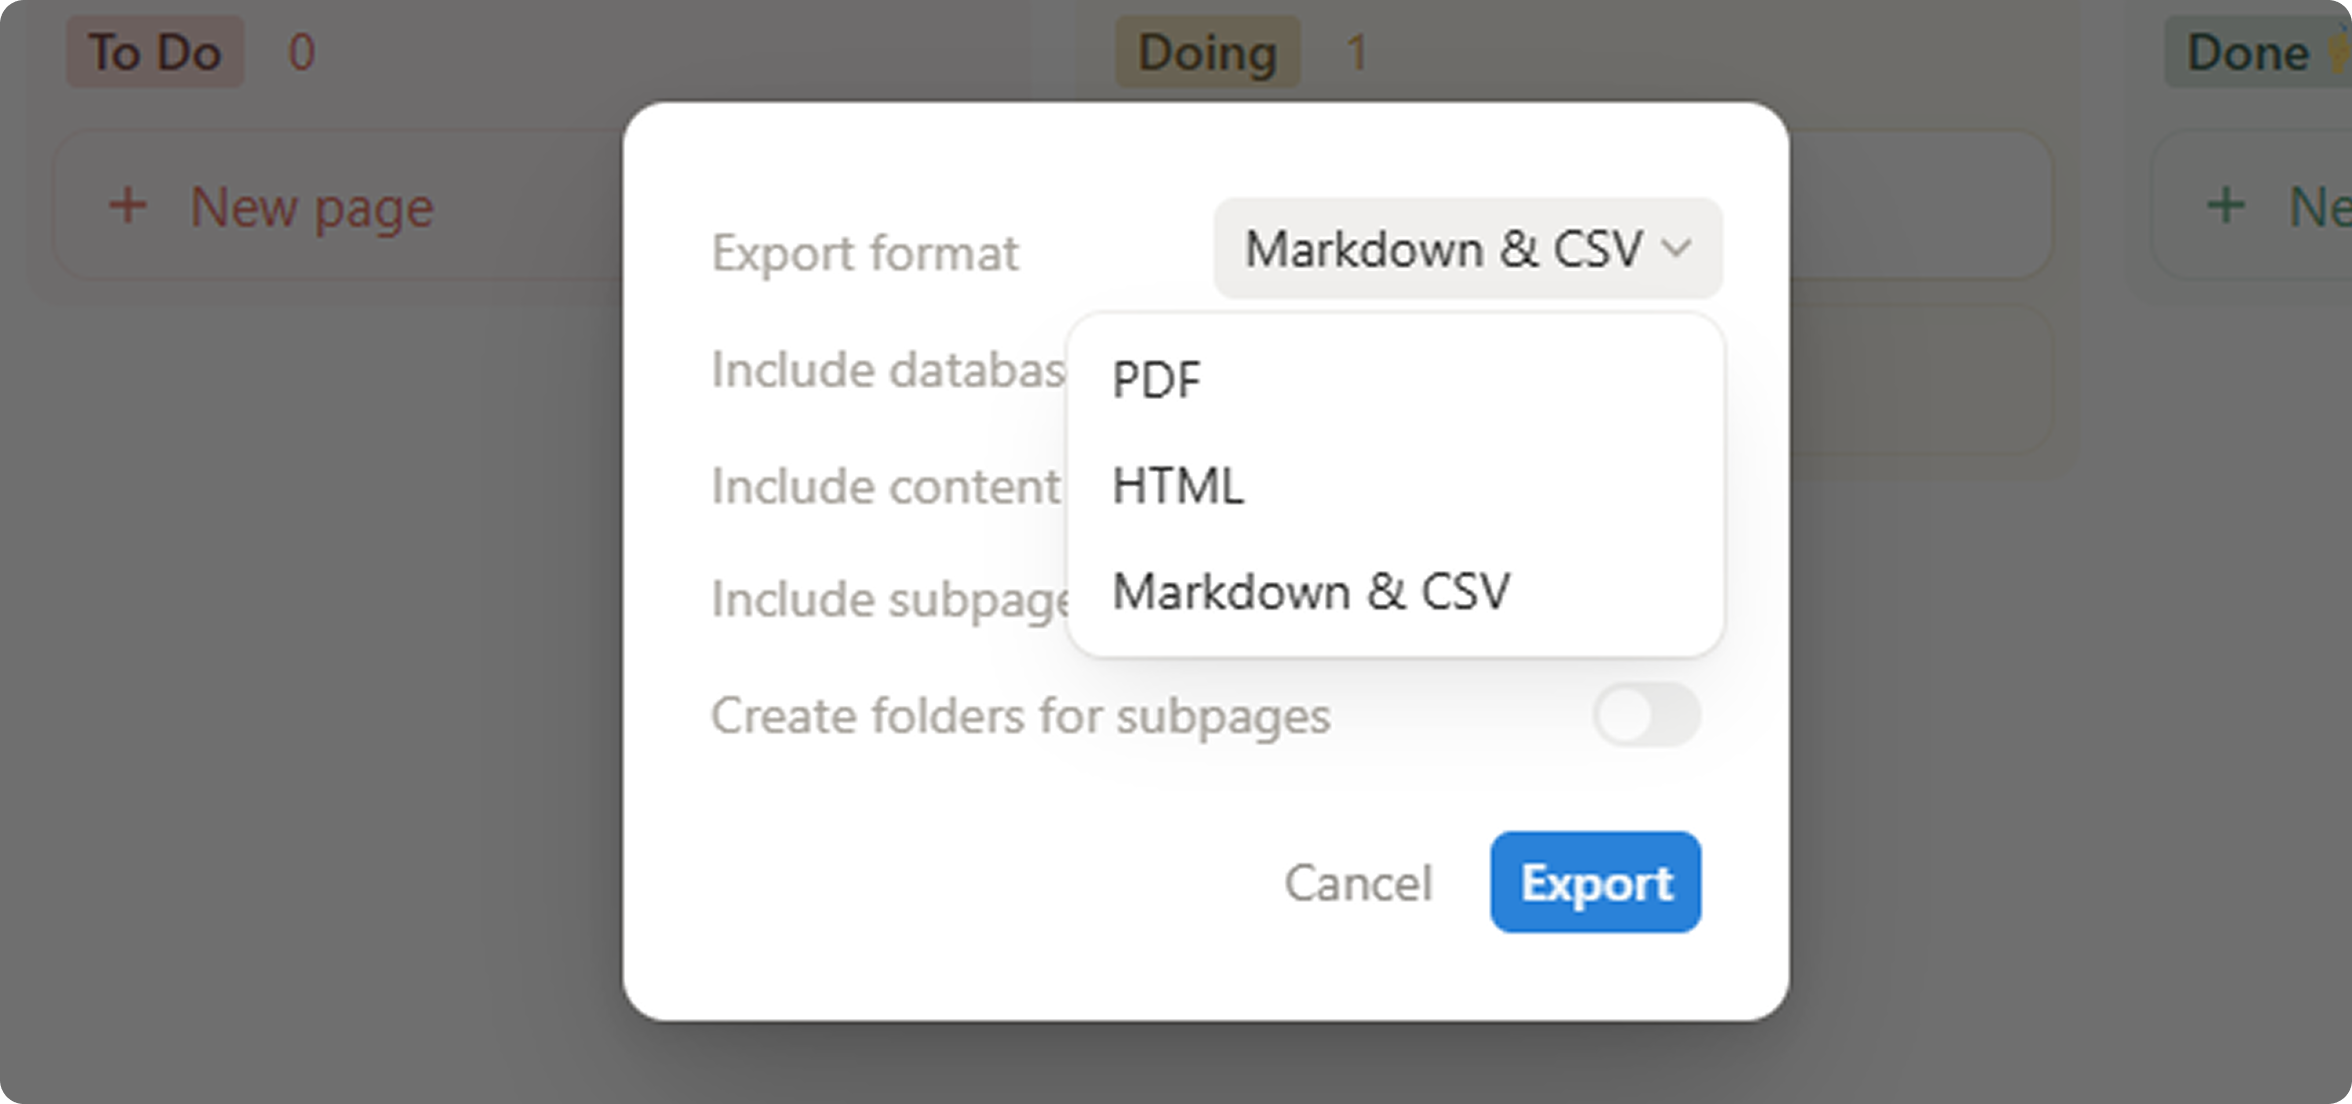
Step 4. Configure Export Settings
Choose export format (PDF, HTML, or Markdown & CSV), select content scope, and enable subpages if you want nested content included.
Step 5. Download File
Click Export. Notion will generate a download link or start a ZIP download, depending on your selected export settings.
Import to
 Teambox
Use the Spreadsheets importer
If you're managing your work in an Excel, CSV, XML, JSON, TSV, or TXT file, you can easily import it into Teambox. After you upload your file, the importer will guide you in mapping the data to Teambox task fields or Custom Fields.
You can also import from external apps like Jira, Slack, or Monday. Or documents like Google Docs, or Markdown files.
Prepare a spreadsheet for import
The task name is a required field. Make sure to include a column of task names in your spreadsheet. Read our article Prepare a spreadsheet for import to learn more.
Warning
There is a 10,000-row limit for imported spreadsheets. For files larger than that, we recommend breaking the file into batches with a maximum of 10,000 rows each.
Fields supported by the Spreadsheets importer
During your preparation, you may also want to see which Teambox fields are supported by our importer.
Import a spreadsheet
To import a spreadsheet:
- In the sidebar, click your Team avatar and select Settings.
- In the Team settings sidebar, select Imports / Exports.
- On the Import Destination page, from the Choose project dropdown, choose a Project.
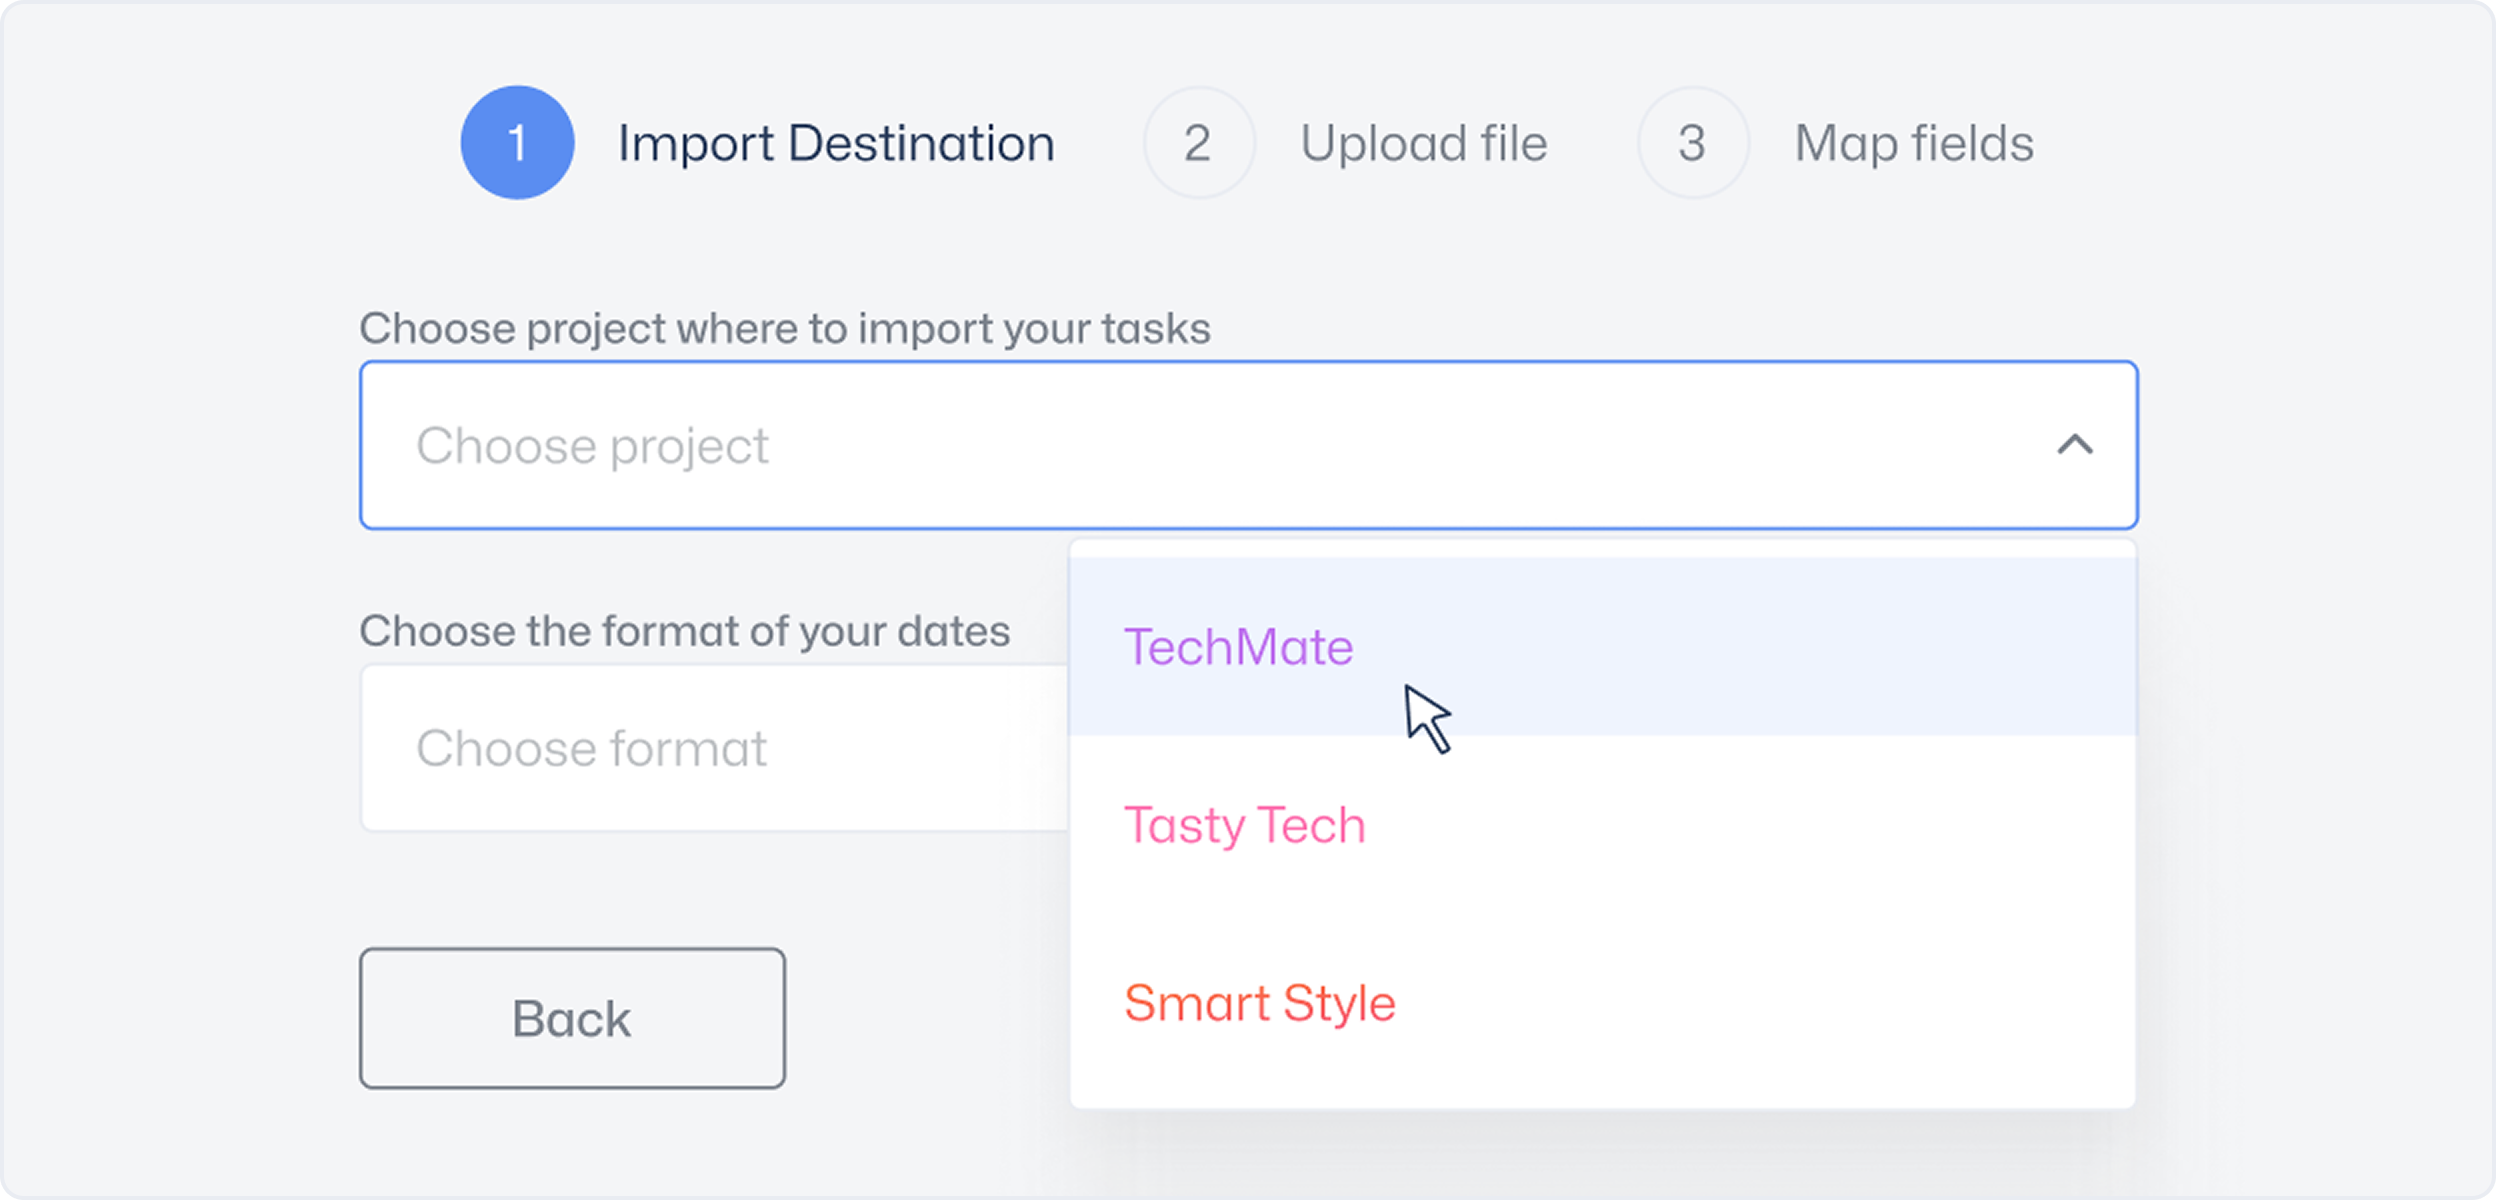
- From the Choose format dropdown, choose your date format.
- When the Upload file opens, drag and drop or upload a spreadsheet.
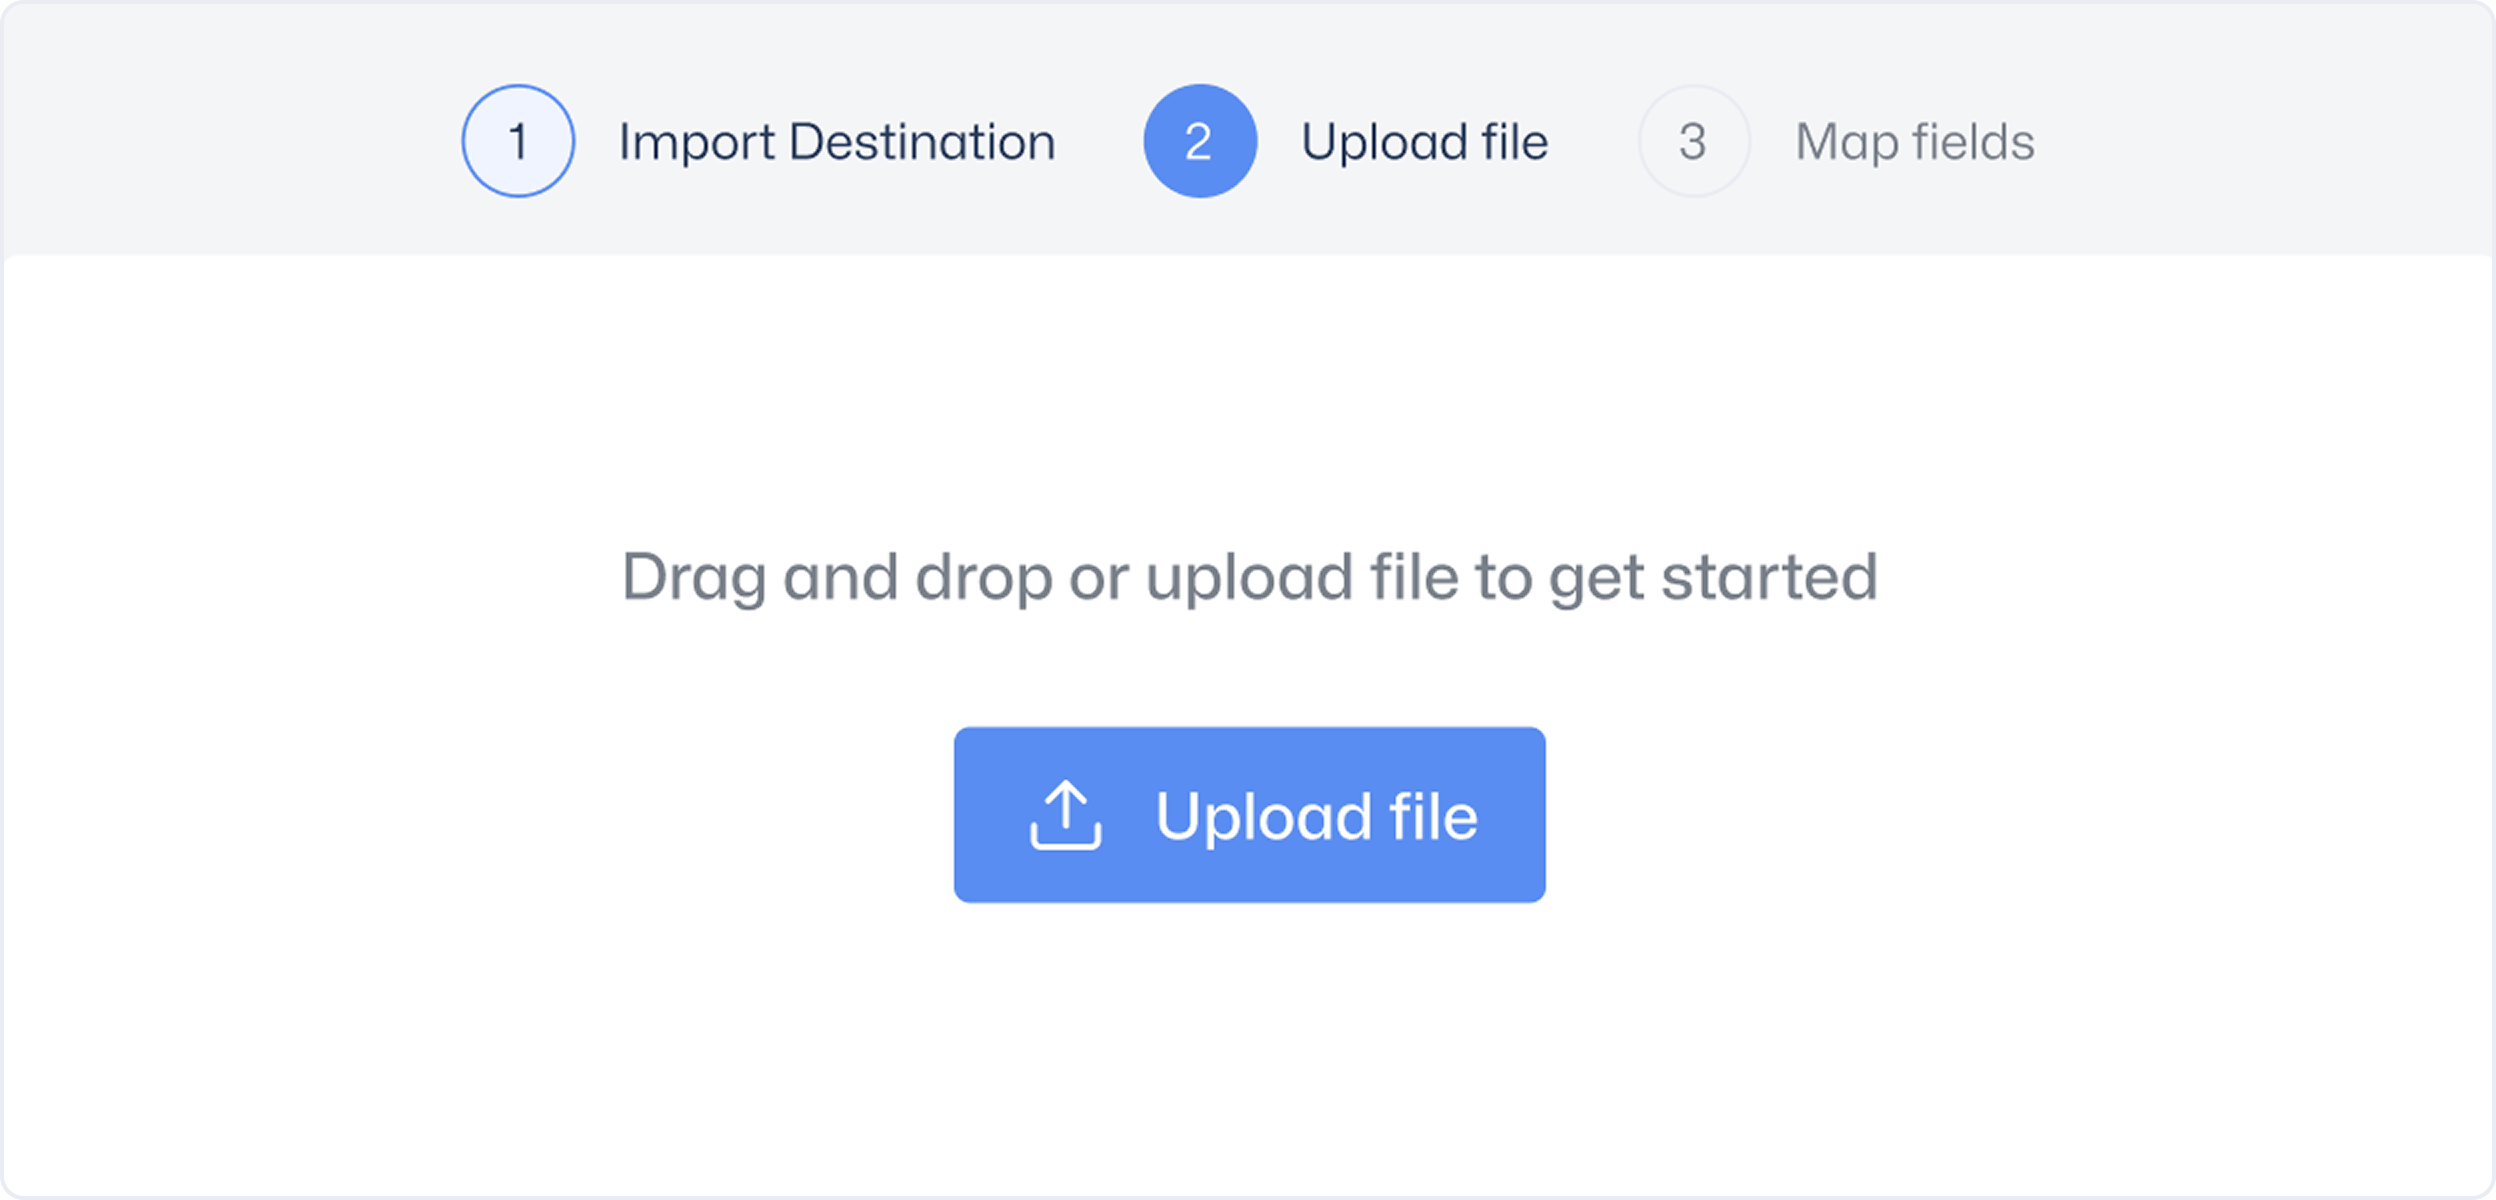
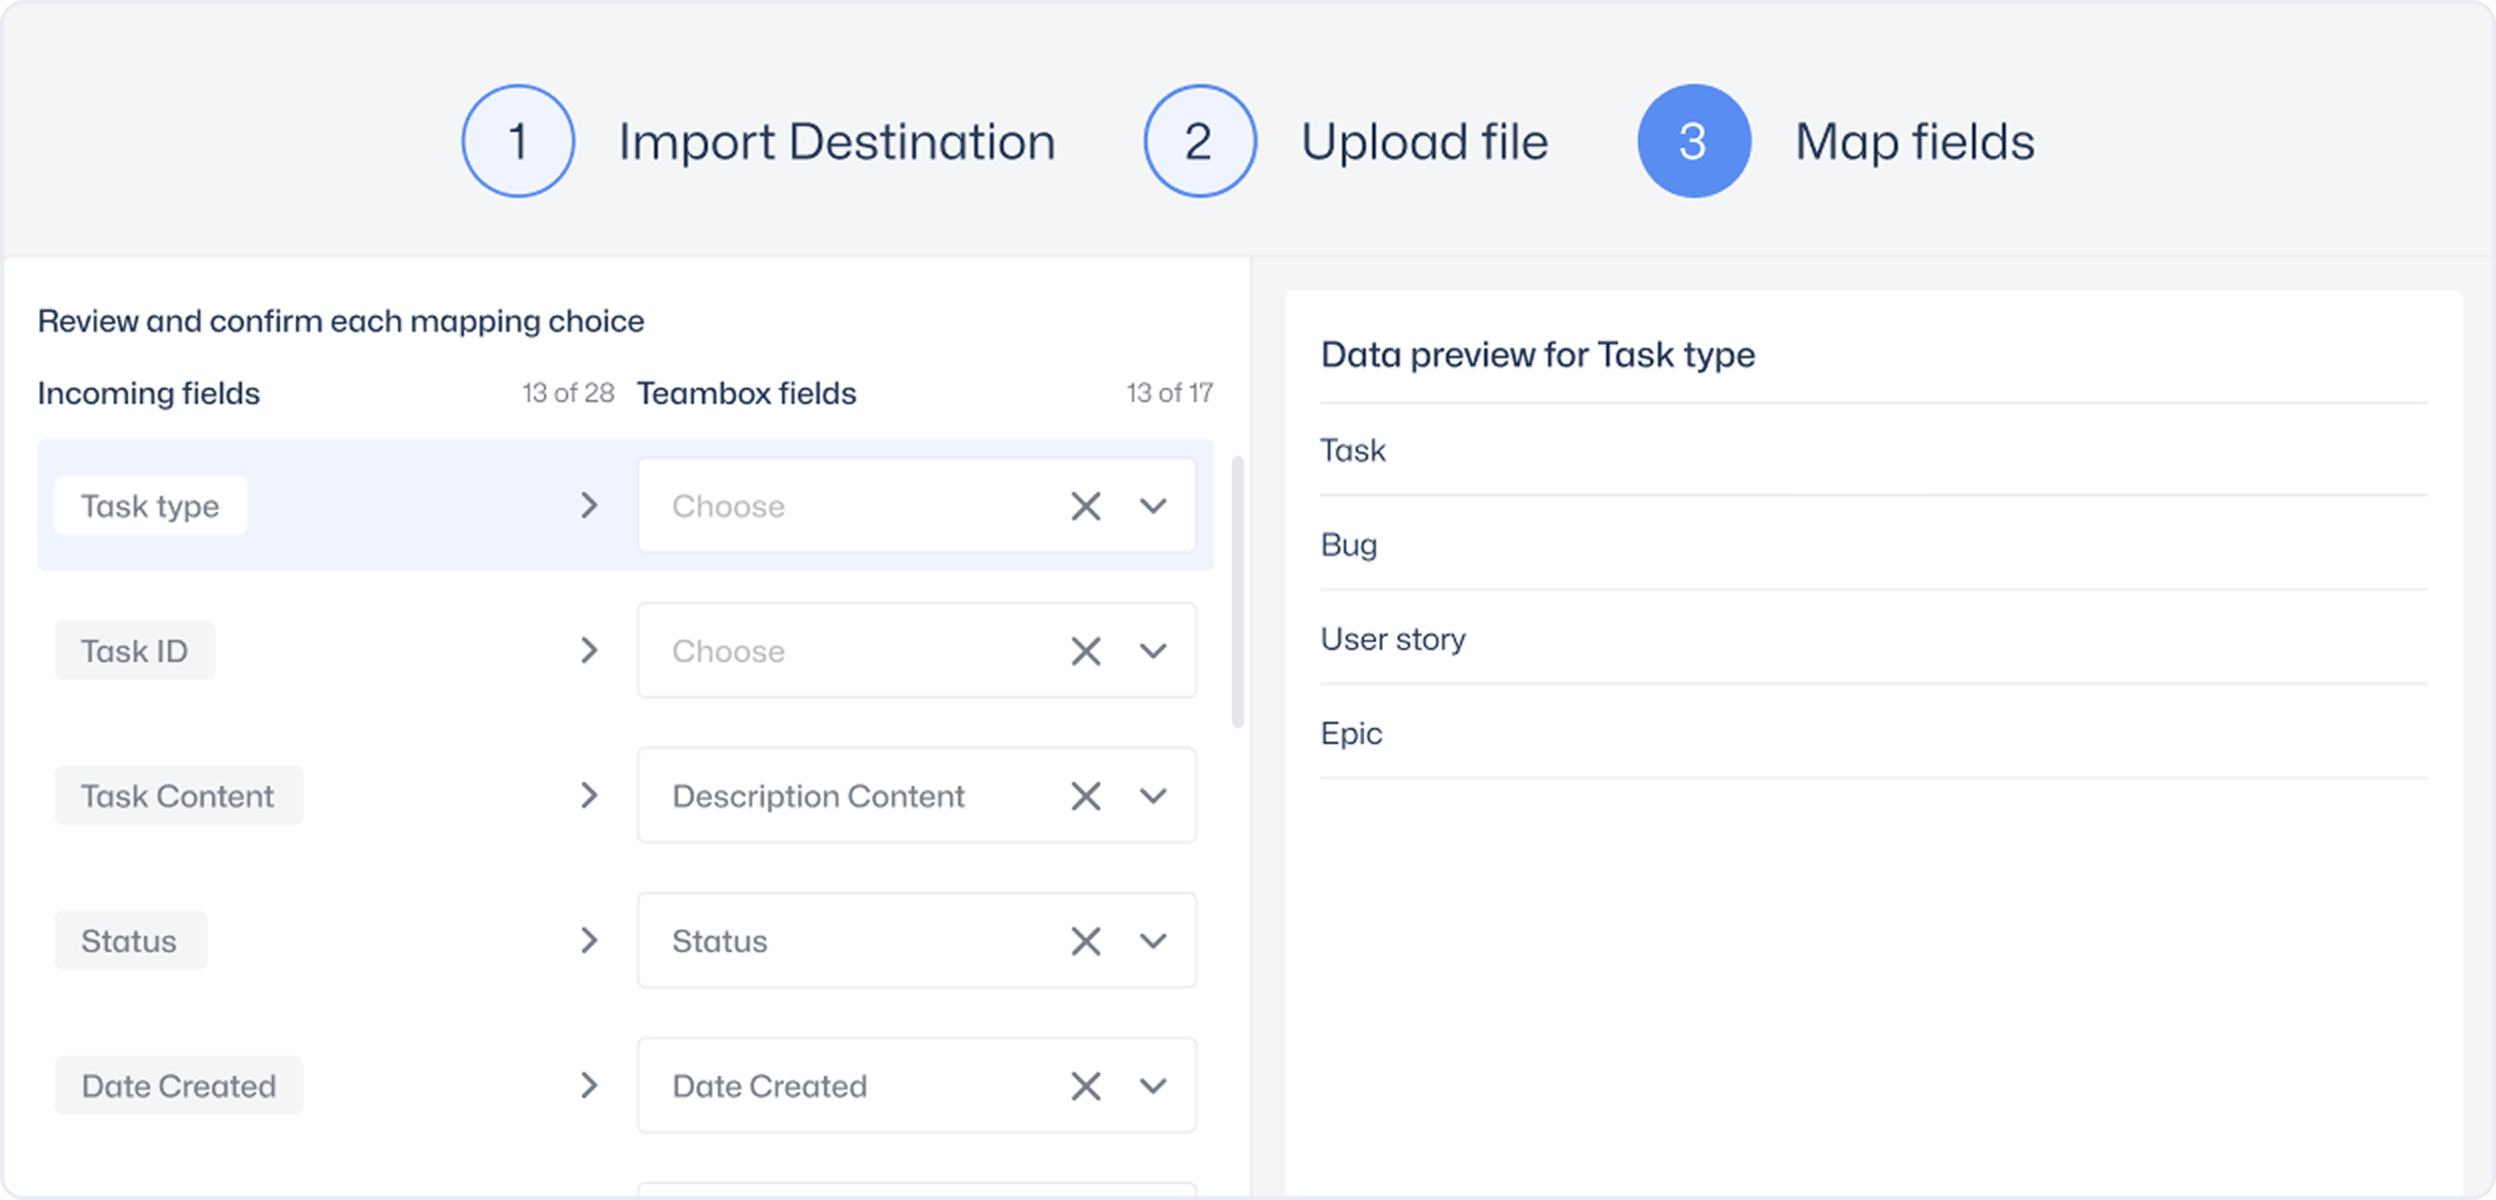
- A successful upload will open in the Map fields page.
Mapping data
Mapping means matching the columns in your spreadsheet to Teambox task fields and Custom Fields. The importer simplifies this by automatically aligning your data with the correct fields.
Review and confirm the field mapping choices
Each column from your file is automatically mapped to a Teambox task field type. Before continuing, check the mappings and edit the field types if necessary.
To review the field-mapping choices:
- On the Map fields page, hover over a row to see a data preview pane on the right.
- Ensure the data in the pane matches the field in the Teambox Fields column.
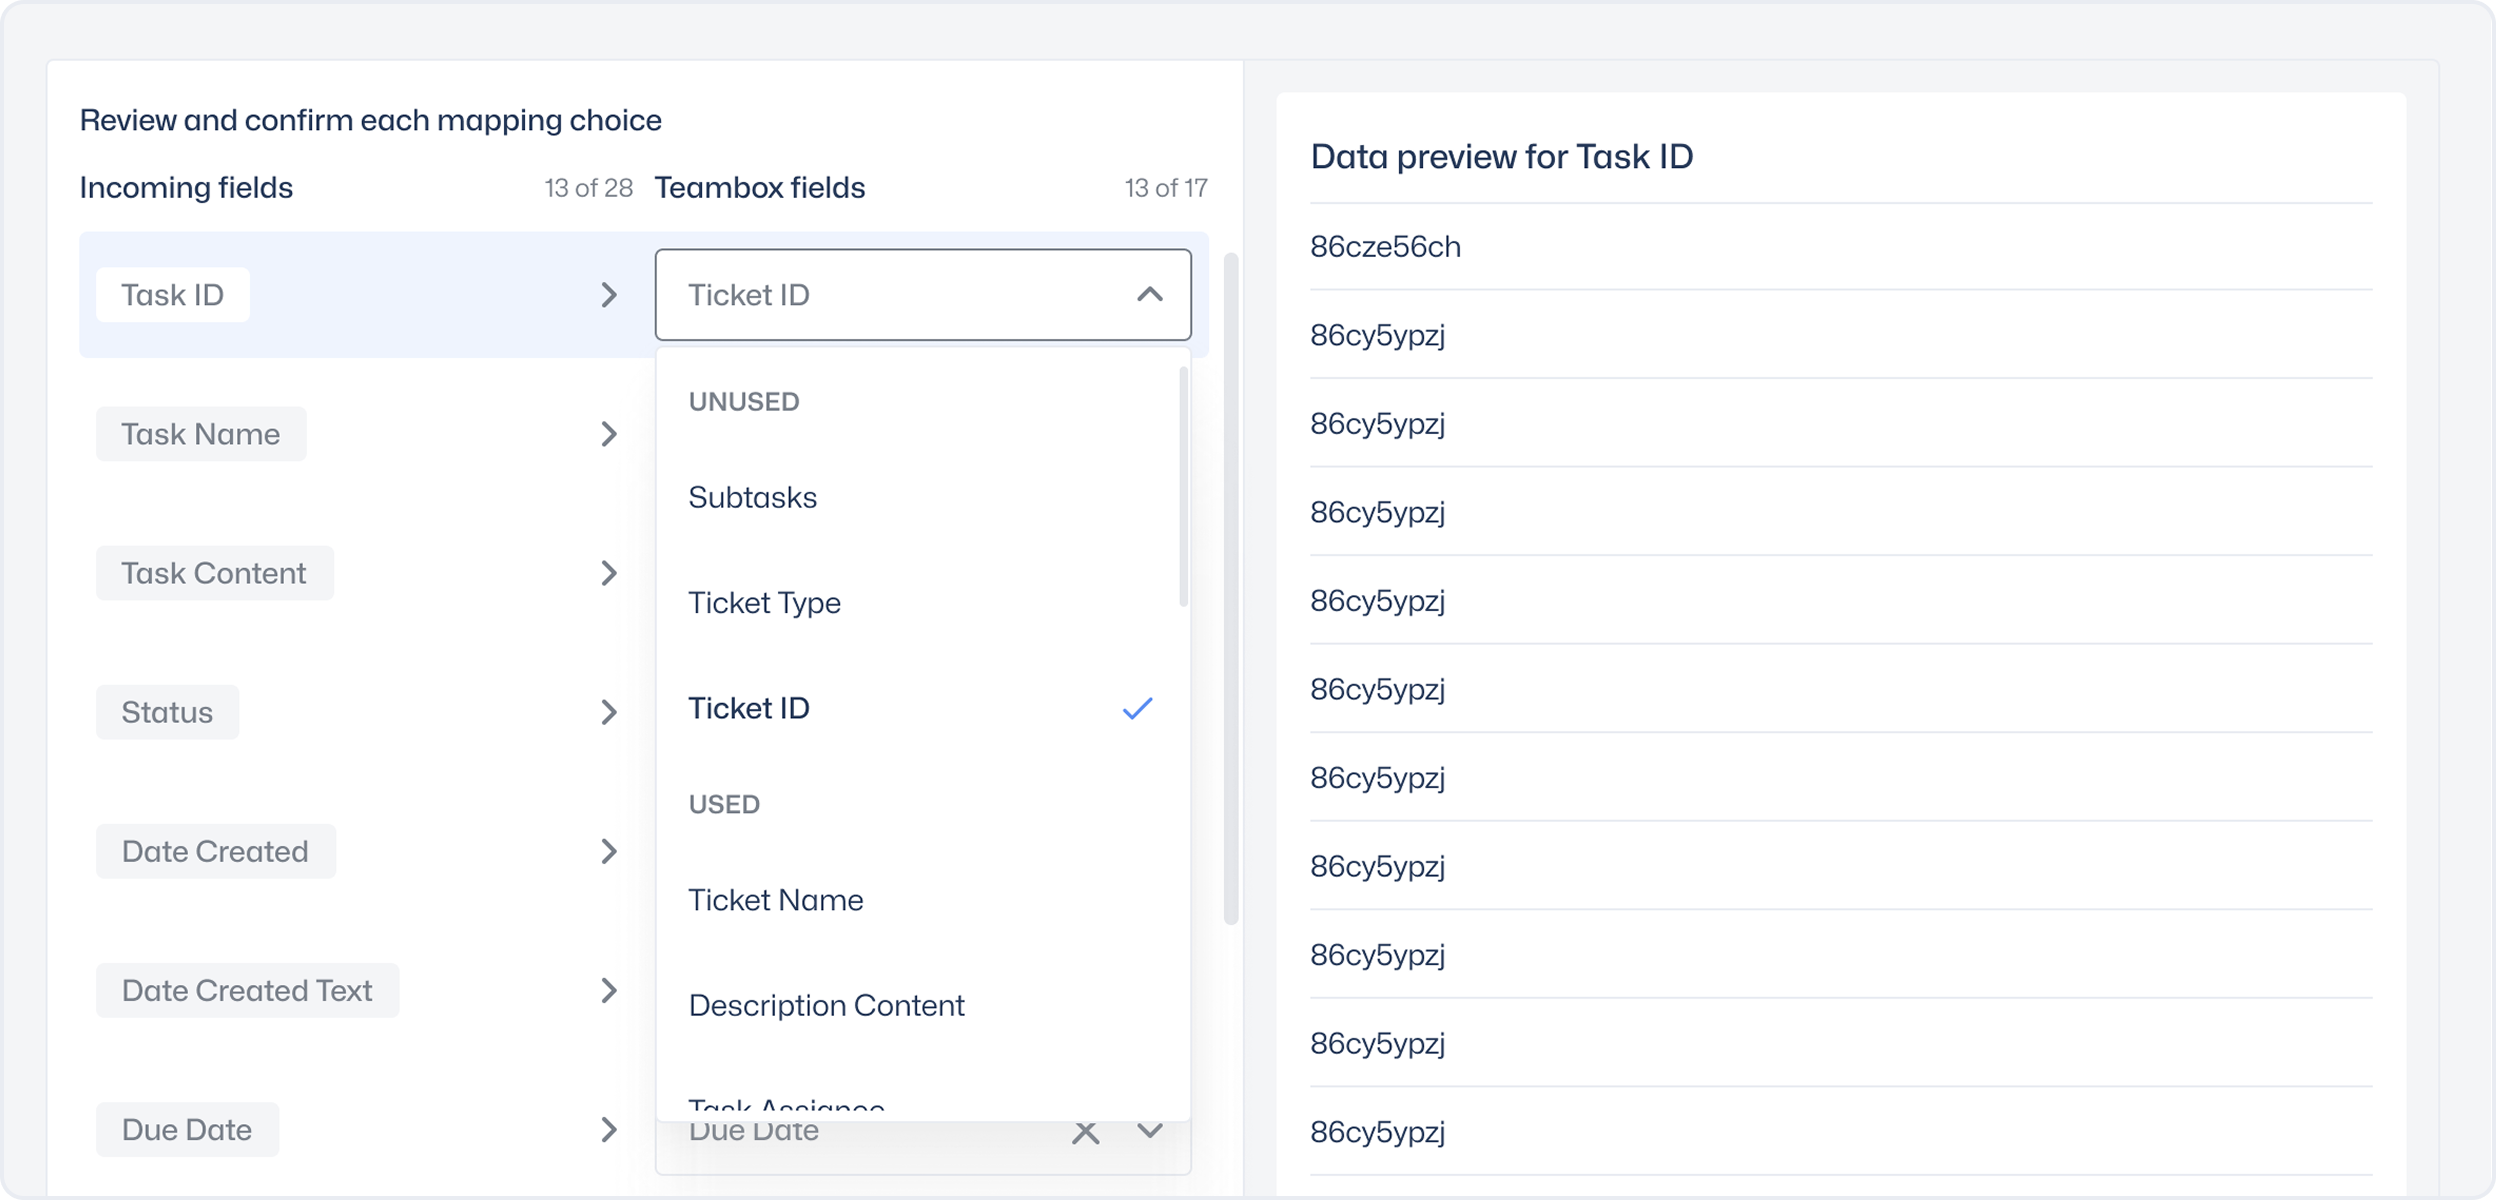
- When you're finished, click Continue.
Add a Custom Field
If you want the data in a particular column to populate a Custom Field after import, do the following:
- On the Map fields page, in the Teambox Fields column, hover over a row.
- Click the current field and scroll down to the Add New section.
- To map to a Custom Field, click Add as new custom field. The field will be named after the column it's mapped to.
- Click Continue.
- In the next step, you can map this field to a Custom Field type in the Space you chose.
Map the data to existing task fields
In the previous step, you mapped each column in your file to a Teambox field type or Custom Field. Now you'll map the data in certain columns to the task fields existing in the Space you chose.
To map the data to existing fields:
- On the Map Fields page, in the Destination Values column, click the dropdown in each row.
- Map the incoming value with a field from the Space.
- Click Continue.
If you have imported email addresses for task assignees that do not exist in your Workspace, you cannot map them. You can also select options like keep value as is or do not import.
Import into Teambox
If you've imported any blank or editable cells, a dropdown displays in that column. Click the dropdown to add or edit a value.
On the final Spreadsheets Importer page in the upper-right corner, you can use the following settings and filters to review and update your import:
When you're done reviewing the import, in the upper-right corner click Import.
Was this article helpful?
Related articles
Prepare a spreadsheet for import
Intro to importing your work into Teambox
Create a table
Set up your personal workspace
Customize List view
Recently viewed articles
Set up your personal Workspace
Create a table
Prepare a spreadsheet for import
Import from Trello
Import from Monday.com